Faking the 3D look using corelDRAW - by 3dcoreldraw Team
This title and
image was inspired by a PS tutorial done by Vinny chirayil for
3dtotal. All design credit goes to him. Hats off to Vinny Chirayil.
This tutorial aims to break the tradition of using coreldraw for
flat graphic designs only. It is also my tribute to the
original artist's work. Anyone familiar with coreldraw can do
this artwork without being an artist. "Only the basic tools of
the software along with a keyboard and a mouse have been used" -
quote from the original artist.
This tutorial assume that you have some basic knowledge of computer and also corelDRAW Graphic Suite. With a mouse and CorelDRAW version 9 through X4, you can do this tutorial. However, we used CorelDRAW X3 during the writing of this tutorial.
The first step: ---------------------------------------------------------------------------------------------------------
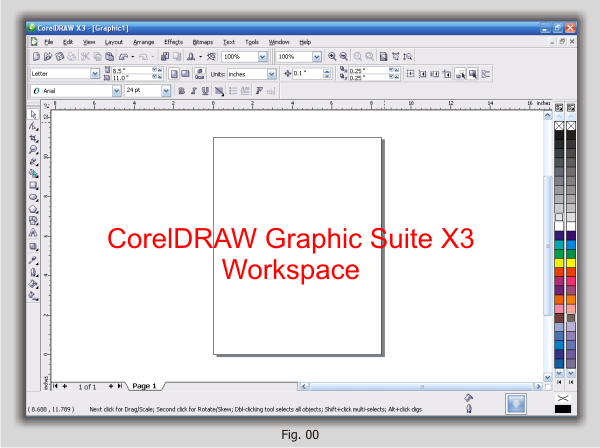
To begin the tutorial, open the CorelDRAW Graphic Suite Program. A opened CorelDRAW Graphic Suite Program workspace window (Fig. 00).
Creating the background: --------------------------------------------------------------------------------------------
Pick the "rectangle tool" from the toolbox located on the extreme left of
the document window (Fig. 01).Drag the "rectangle tool" to draw a rectangle convering the A4 drawing area. Your rectangle should like as in (Fig. 02).
From the toolbox, click on the "fill tool" and a fly-out menu is displayed. Select the "fountain fill dialog" (Fig. 03) and at the fountain fill dialog window input the following settings (Fig. 04):
Type: Linear
Angle: -90.0 Edge Pad: 20 Color blend: Two color
From: Black To: Deep Yellow Midpoint: 50
Click the "OK" button to apply this fill to the rectangle. Your rectangle will now look as below. This will be our background for the work.
Creating the ball: -----------------------------------------------------------------------------------------------------
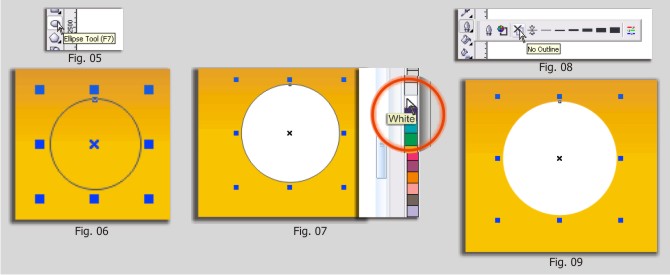
From the toolbox, pick the "ellipse tool" (Fig. 05) and draw a circle while holding the "CTRL" key on the keyboard to make a perfect circle as in (Fig. 06).
On the "Color Palette" click the "white" color (Fig. 07). Click the "Outline Tool" and select "No Outline" (Fig. 08). Your circle should now look like (Fig. 09).
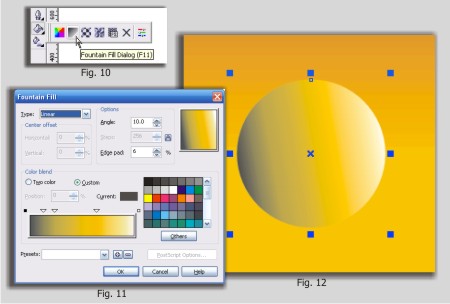
With your circle still selected. Click the "Fill Tool" and select "Fountain Fill Dialog" (Fig. 10). On the fountain fill dialog window input the following settings (Fig. 11):
Type: Linear
Angle: 10.0 Edge Pad: 6 Color blend: Custom (Colors used are Black, Deep Yellow and White. This may need a little tweaking on your part to get it right.)
Click the "OK" button to apply this fill to the circle. Your circle will now look as in (Fig. 12). We have transformed a flat 2d ball into a 3d ball.
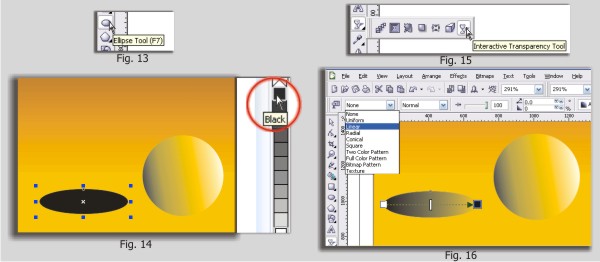
Now all that is missing is the shadows. So lets fix it. Using the "ellipse tool" (Fig. 13) draw an oval shape and click "Black" color on the "Color Palette" (Fig. 14). Click the "Interactive Blend Tool" and on the fly-out menu select "Interactive Transparency Tool" (Fig. 15). Then on the "Property Bar" click the arrow and on the drop-down menu select "Linear" (Fig. 16).
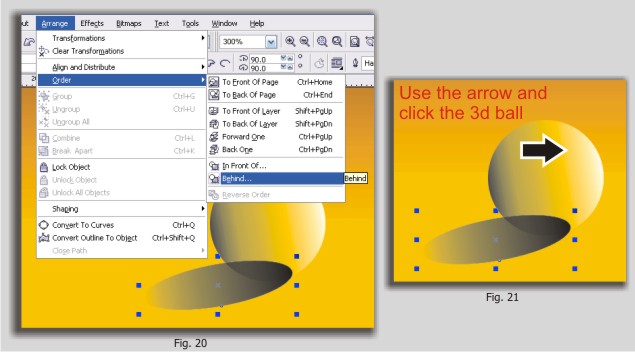
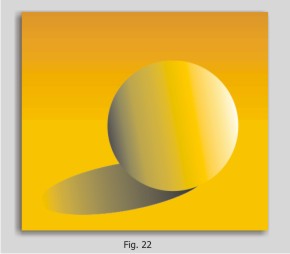
Select the oval shape with the "Pick Tool". Then on the "Menu Bar" select "Arrange" > "Order" > "Behind" (Fig. 20). An arrow appears as your mouse pointer, use the arrow and select the 3d ball (Fig. 21). This will put your shadow behind your 3d ball (Fig. 22).